
Makes 24 gnocchi, serves 2
1 garlic clove
16 oz frozen spinach
8 oz fresh ricotta
5 tablespoons Parmesan cheese, grated
1 egg yolk
6 tablespoons all-purpose flour
1 teaspoon salt
½ teaspoon pepper, freshly ground
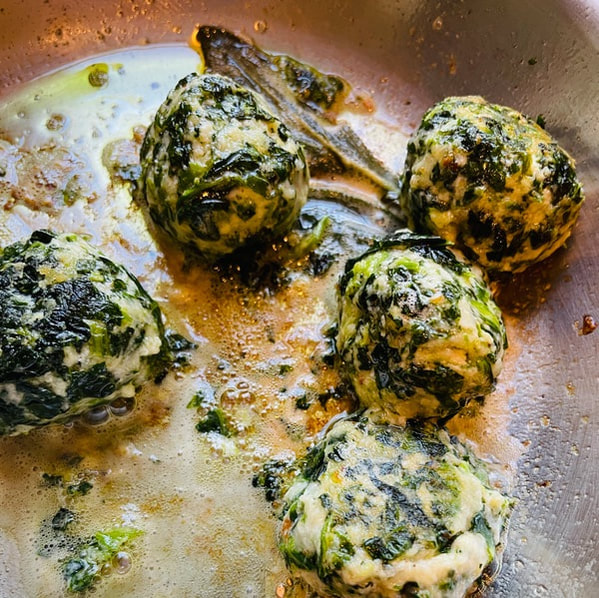
6 tablespoons butter
6 sage leaves
1 garlic clove
16 oz frozen spinach
8 oz fresh ricotta
5 tablespoons Parmesan cheese, grated
1 egg yolk
6 tablespoons all-purpose flour
1 teaspoon salt
½ teaspoon pepper, freshly ground
6 tablespoons butter
6 sage leaves
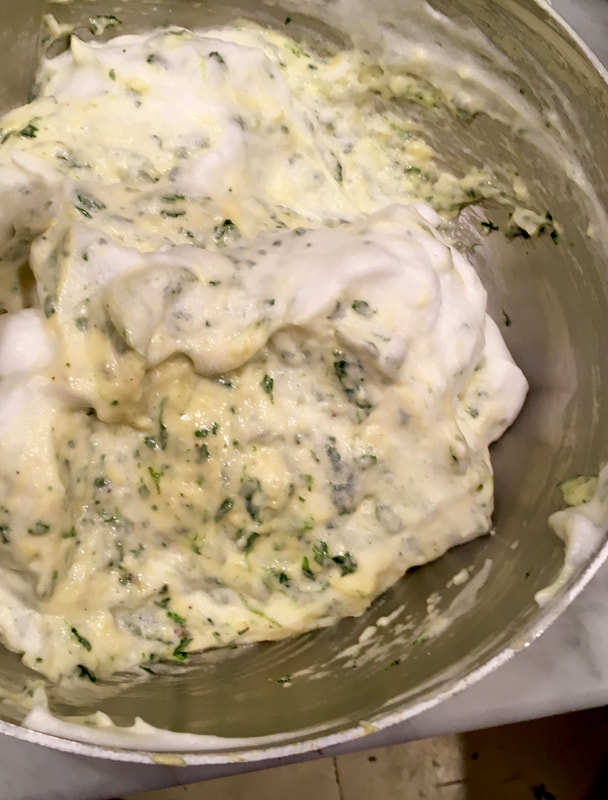
- Thaw the spinach and remove excess water. Squeeze the spinach in a tea towel to remove as much excess water as possible. Chop the spinach well and place in a large mixing bowl.
- Bring a large pot of salted water to boil.
- To make the gnocchi, combine the chopped spinach, ricotta cheese, Parmesan cheese, egg yolk, salt, and pepper. Add 3 ½ tablespoons of flour to the mixture and stir to combine. The mixture should be firm, add more flour if needed.
- Scoop the gnocchi mixture with a tablespoon. Shape into round balls and roll them in flour. Set them on a plate.
- Gently place the gnocchi into the boiling water. Cook for 2-3 minutes, until they rise to the surface. Remove the gnocchi with a slotted spoon and set them aside on a plate.
- To prepare the butter sauce, heat the butter in a large sauté pan over medium-high heat. When the butter begins to bubble, add the sage leaves. Next, add the gnocchi and cook to brown. Serve immediately.


 RSS Feed