Liz Barbour's Creative Feast
  • HOME
  • Programs
    • Lecture Programs
    • Fees
    • Schedule a Program
    • Testimonials >
      • Class Survey
  • EVENTS
    • Calendar
    • Intermittent Fasting Classes
  • FOOD & FUN
    • Recipe Blog >
      • AARP 2025-Cook-Along Classes
      • AARP 2024-Cook-Along Classes
      • AARP 2023-Cook-Along Classes
      • Artisan Bread-Master Recipe
    • Intermittent Fasting
    • Recipes from Hollis
    • Low-Carb
    • Kitchen Tools Liz Loves
    • Barbour Chicks
    • Liz's Edible Gardens
    • Liz's Kitchen Remodel
  • Contact Liz
  • About Liz
    • Liz's Story
    • Liz in The Press >
      • Newspaper
      • Magazine
      • Television
      • Articles by Liz
  • Blog

Edible Flower Canapes

7/30/2020

0 Comments

 
Picture
Picture
Picture
Picture
Picture
Anyone can make these pretty little canapés. Will it help you to think of them as little open-faced sandwiches? That is really what they are. They are little sandwiches prettied up. There are a few tips I want to share to help you enjoy the preparation and the decorating of these tasty treats.
Tips:
  1. Bread-I like Pepperidge Farms white or wheat bread-the thinnest they make. In general, I use thinly sliced breads. I stay away from breads that are dry and crumbly, and I don't find those little rye breads very tasty. I do like crackers that don't break apart with the first bite-too crispy is not good.
  2. To keep your canapés bread or cracker from getting soggy the first layer should be some type of fat. Cream cheese, butter, hard or soft cheese-any high fat, spreadable condiment should be fine (not oil). The fat acts as a barrier between the bread/cracker and a water containing ingredient.
  3. Decide if your flavor will come from the spread or the toppings. Canapés are a small bite and the flavor is a big factor. If you want the spread to provide the main flavor, you can season the spread with herbs, spices, citrus, or anything you would like. I like pesto, olive tampanade, and other spreads. If the toppings add the flavor, keep your spread simple, but of good quality. Plain salted butter or cream cheese are excellent choices. 
  4. Toppings should be thinly sliced and easy to bite. 
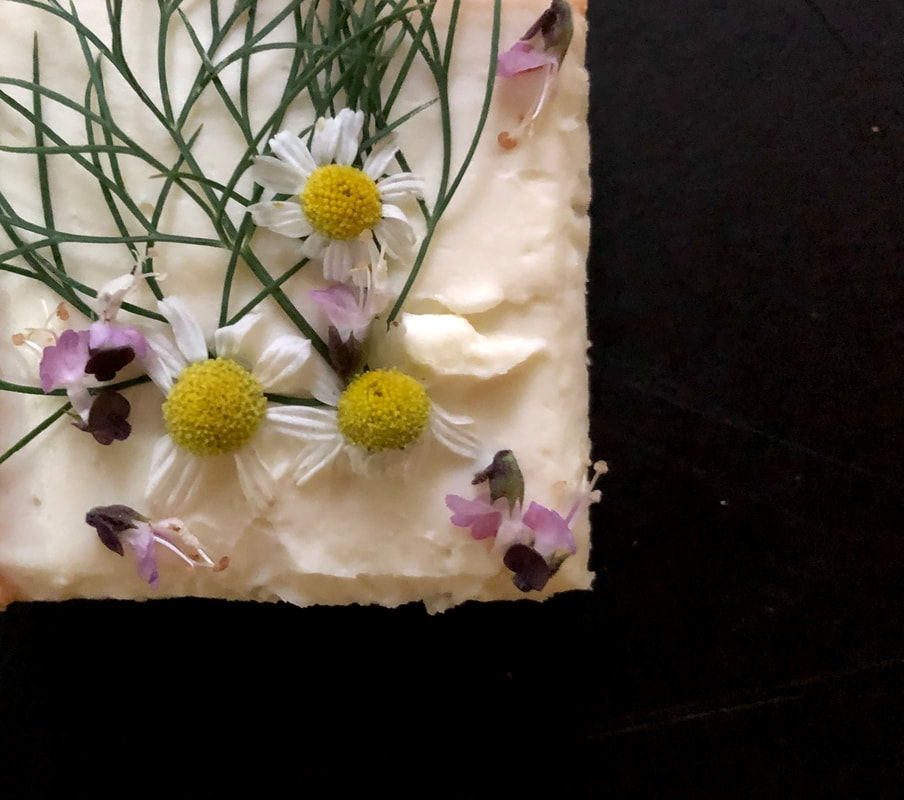
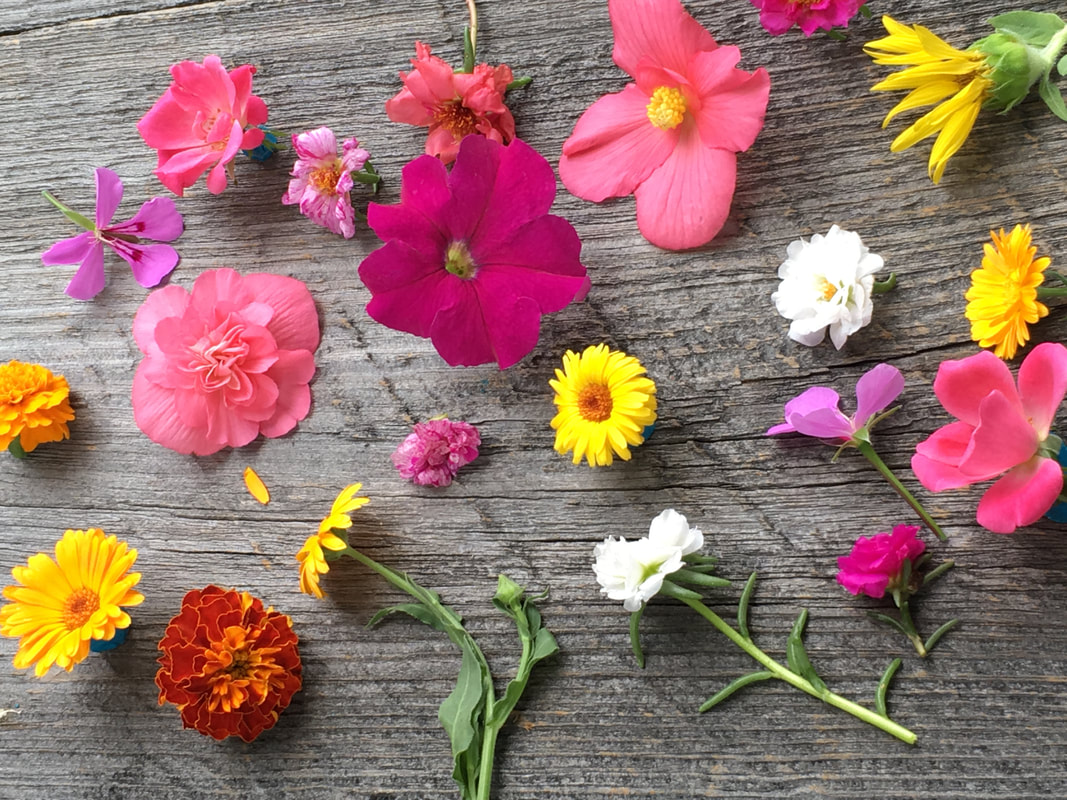
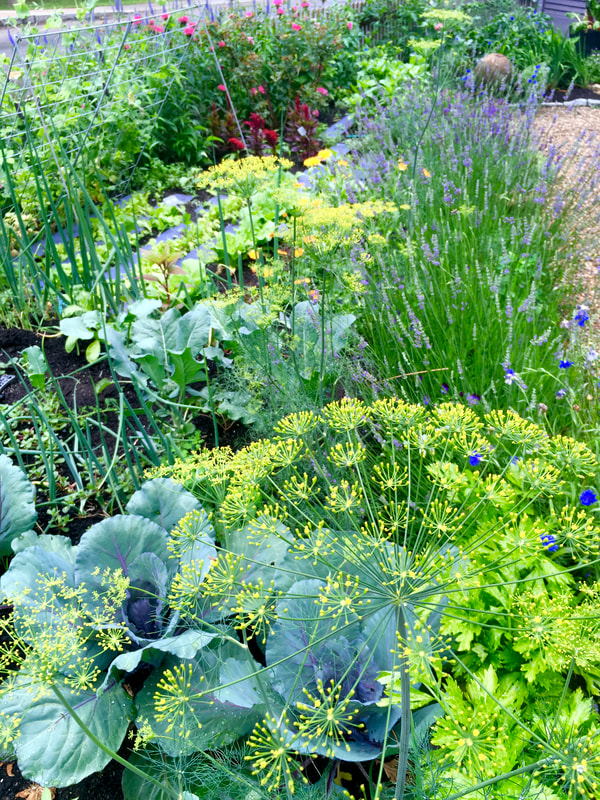
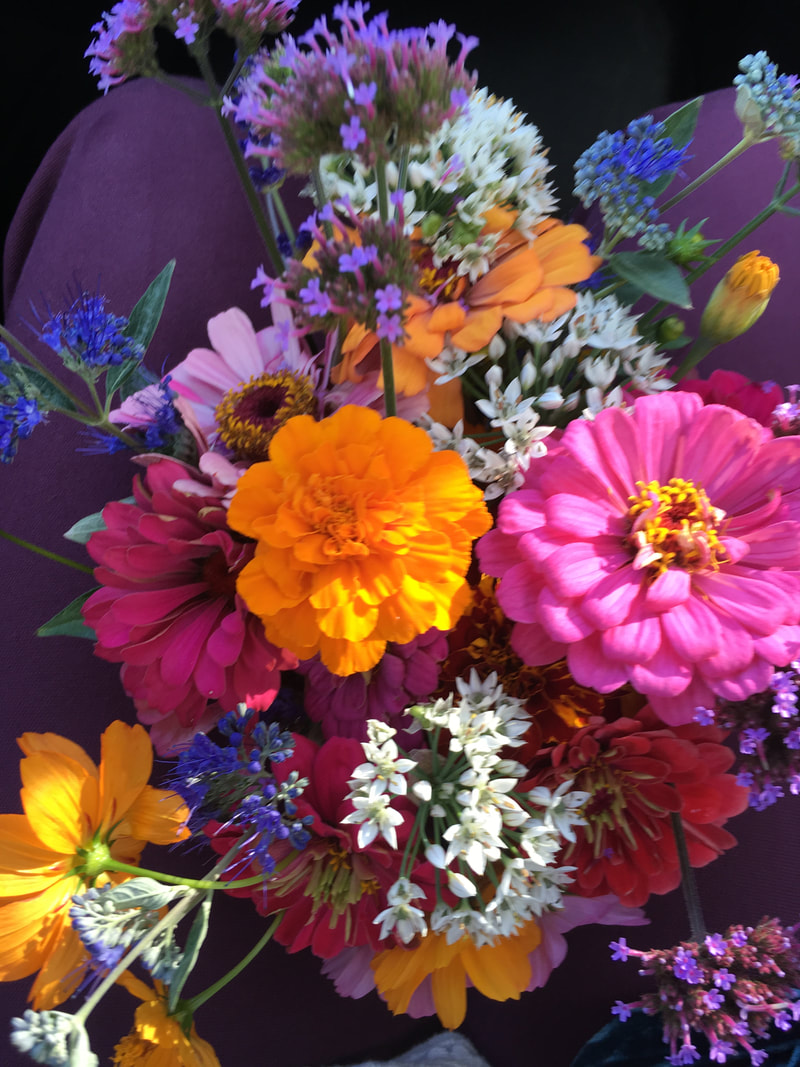
  5. Garnishes of herbs and edible flowers should be fresh and dry.
  6. Design with color and texture. Think of each canapés as a blank canvas and you are the painter.
  7. If preparing ahead of time, store in the refrigerator with a lightly dampened paper towel sitting directly on the canapés. Cover that with plastic wrap loosely wrapped on top or in a covered container. Preparation can be done 2-3 hours ahead.
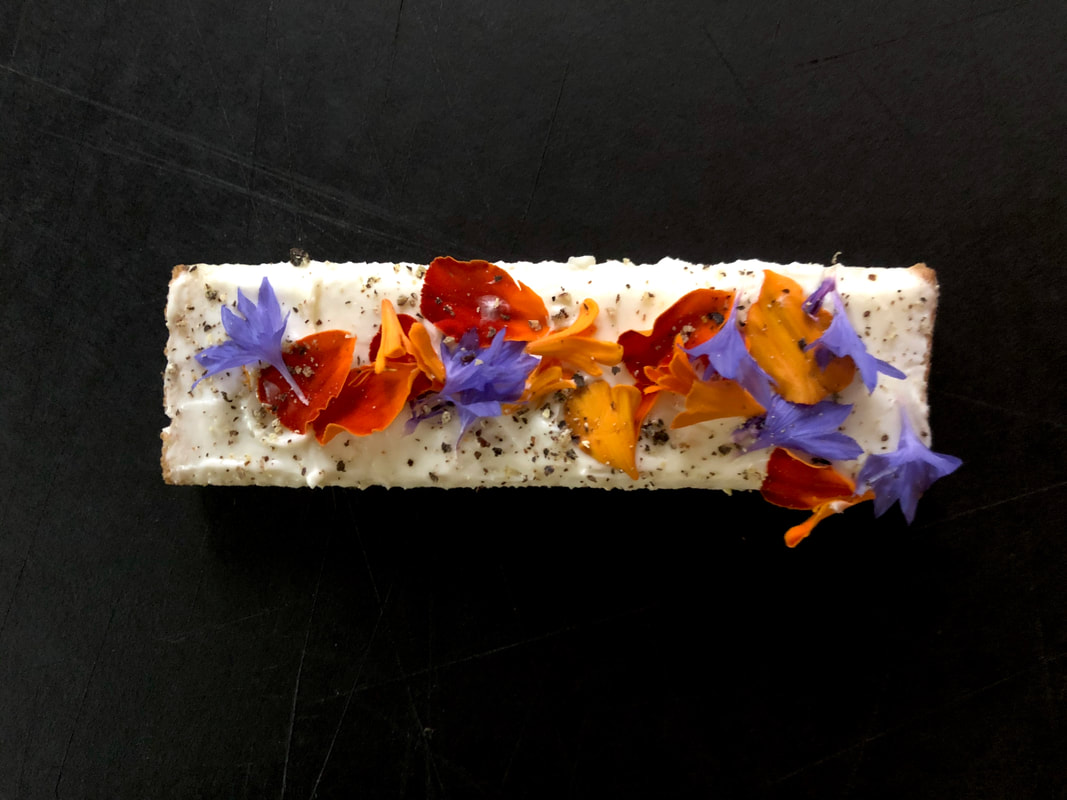
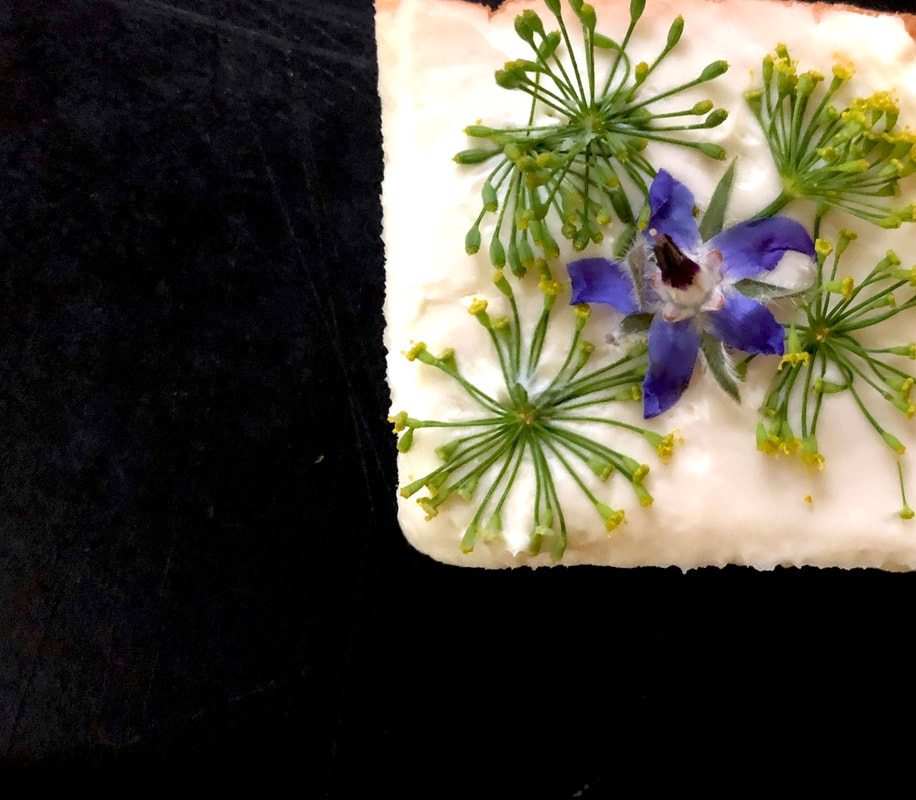
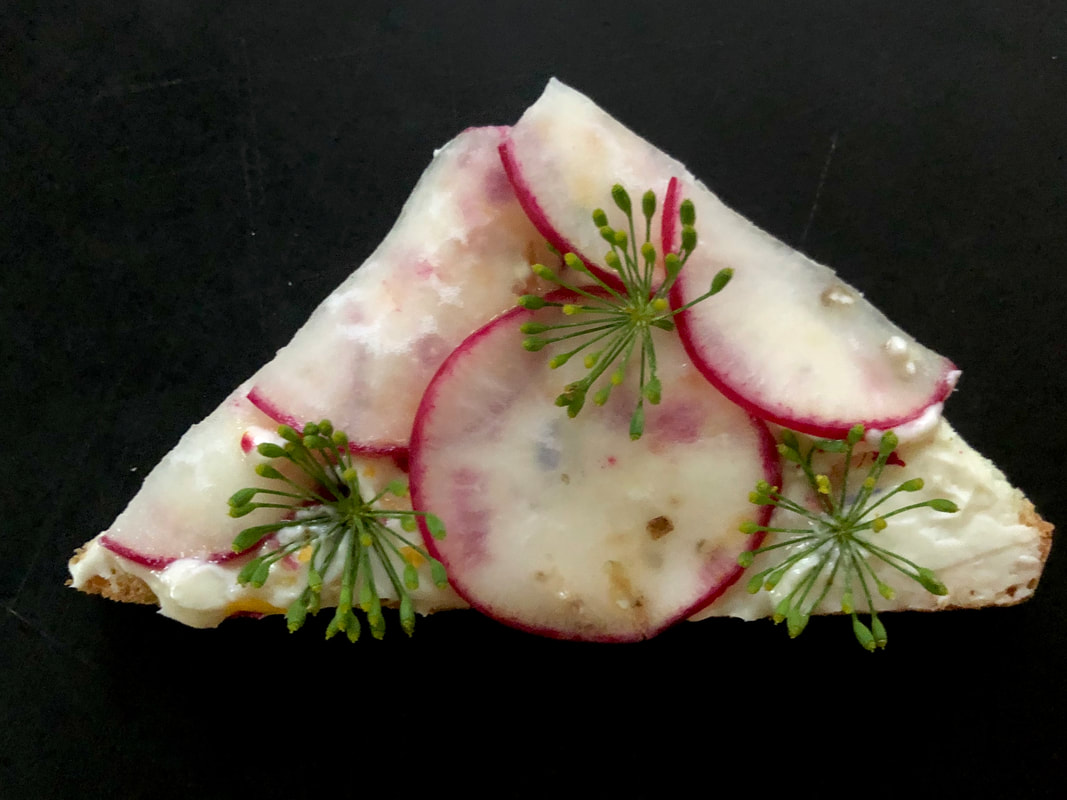
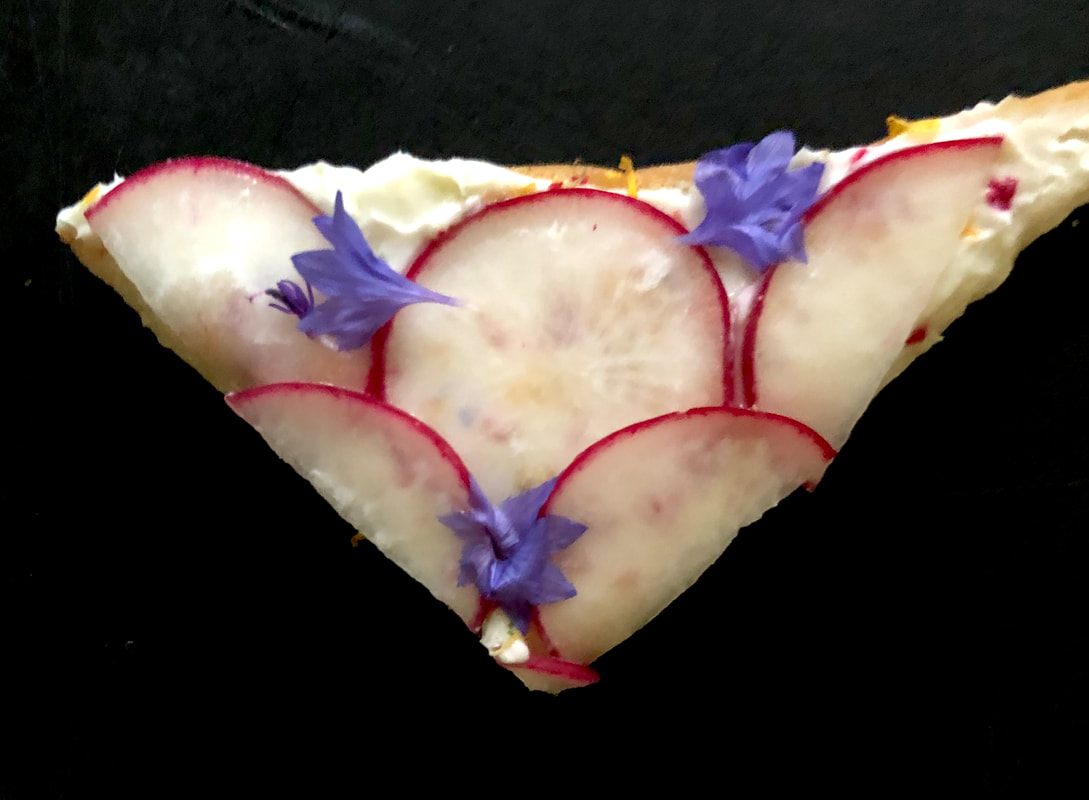
Ingredients from the photos above:
Cream cheese, radishes, dill flowers, bachelor button petals, chamomile flowers, Thai basil flowers, dill, borage flowers, marigold petals.
0 Comments

Summer Refrigerator Pickles

7/27/2020

0 Comments

 
This recipe is adapted from my good friend John Lastowka. John is a man of many talents and is passionate about farming the good earth. I am learning so many things from him. I hope you enjoy his pickles.
​2-3 cups cucumber, peeled or unpeeled, sliced ¼ inch thick-use as many as it takes to pack the jar.
1 cup red onion slices-sliced ¼ inch thick
½ cup vinegar-white, apple cider, or red wine vinegar
½ cup water
1 tablespoon coarse salt
3 tablespoons sugar
¼ cup onion, sliced thinly-red or Vidalia 
1 tablespoon fresh dill and or large dill flower
2-quart jar with tight fitting lid
 
Additions:
¼ teaspoon crushed red pepper
3 chive flowers
2 tablespoons chopped chive or scallions
 
1. Layer the cucumbers and red onion in the jar, pressing to pack them in. 
2. Pour and sprinkle the remaining ingredients into the jar. Cover tightly and shake to mix ingredients. For the first hour, shake the jar several times to help dissolve the sugar and water and combine evenly. 
3. Place the jar in the refrigerator. The pickles will be ready to eat in 2-3 hours and get tastier over time. The pickles will keep in the refrigerator for about 2 weeks.

​Note: I reuse my pickling liquid for a second batch.
 
Vegetable options:
Cucumbers, zucchini, cauliflower, thinly sliced beets, green tomatoes, blueberries, peaches, plums
0 Comments

No-Bake Cheesecake Parfait

7/27/2020

0 Comments

 
 6-8 servings
​
1 ½ cup crushed cookies (ginger snaps, chocolate wafers, graham crackers)
 2 eight-ounce packages cream cheese, room temperature 
1 14-ounce can (1 1/4 cups) sweetened condensed milk
1/4 cup fresh lemon juice
1 teaspoon vanilla extract
1-12 package frozen raspberries (keep frozen)

  1. Divide the crushed cookies evenly between 4-6 ounce glasses or dishes. 

  2. Using a food processor or mixer, combine the cream cheese, condensed milk, lemon juice, and vanilla. Process until smooth. 
  3. Pour the cheesecake batter over the cookie crumb layer. Refrigerate for 2-3 hours or up to 4 days. Top with sliced or whole berries. Serve cold. 
Alternatives:
Substitute the vanilla extract with 2 tsp rose water.
Use fresh or frozen berries-thaw frozen berries before topping your dessert.
Use your favorite jam or lemon curd in place of berries.
0 Comments

Raw Broccoli Salad

7/23/2020

0 Comments

 
Serves 4 with leftovers

5-6 cups fresh broccoli florets and cut stems (about 1 pound of florets)
¼ cup of red onion, chopped
½ cup dried cranberries or raisins
1 cup mayonnaise (or ½ cup mayonnaise and ½ cup sour cream or plain yogurt)
2-3 tablespoons apple cider vinegar
1 tablespoon honey, or 1 teaspoon sugar
Salt and pepper to taste.
 
Additions: 2 cups shredded sharp cheddar cheese, cooked bacon, 1 cup peas, chopped celery, pumpkin seeds, sunflower seeds, or slivered almonds.
 
  1. Combine the cut broccoli florets and stems, chopped onion, and dried cranberries in a large serving bowl. 

  2. In a separate bowl whisk together mayonnaise, cider vinegar and honey. Add the dressing to the salad and toss to mix well. Season with salt and pepper to taste. Chill thoroughly before serving. The salad will keep in refrigerator for 3-4 days.
0 Comments

Blueberry Sauce-Sweet and Savory Variations

7/23/2020

0 Comments

 
One of my favorite sounds of summer is the first picked blueberries falling into my bucket.
1 ½ cups fresh or frozen blueberries
½ cup water
¼ cup granulated sugar-add more or less depending on how sweet your berries are
Zest of ½ lemon or orange 
1 tablespoon cornstarch
¼ teaspoon vanilla extract
½ cup blueberries
Pinch salt
Optional: 1 tablespoon fresh basil, chopped
                ¼ teaspoon dried lavender
 
  1. Combine the blueberries, water, sugar. Bring to a simmer and cook until the blueberries burst, about 5 minutes.
  2. In a small bowl, whisk the cornstarch with 1 tablespoon of cold water to create a slurry.
  3. Slowly stir the cornstarch slurry into the blueberries over a low flame. The sauce will thicken immediately. Continue to cook while stirring for 1 minute.
  4. Remove the sauce from the heat and gently stir in vanilla, lemon zest, ½ cup blueberries, and optional herb if using. Let the sauce cool down and refrigerate until ready to use. Store the sauce in the refrigerator for 2 weeks or freeze for up to 6 months.

​Serving suggestions: 
Topping: Serve over ice cream, yogurt, cake, French toast, or pancakes. 
Soup: Add heavy cream and/or sweet wine to create a cold blueberry soup. Add additional berries (raspberry, black berry, strawberry).
Savory Sauce: Heat the desired amount of sauce in a saucepan with 1-2 tablespoons of balsamic vinegar and ¼ teaspoon crushed red pepper.   Season with salt and pepper to taste.  Serve over pork, chicken, or fish. 

0 Comments

Mayonnaise-Homemade and Fail Proof

7/21/2020

0 Comments

 
Many times I come across a recipe from a website or cookbook and it finds a home in my pantry. This mayonnaise recipe is one. I discovered it online at Inspired Taste.
​I began preparing homemade mayonnaise when I discovered that most of the store bought mayonnaise is made with canola oil and/or soybean oil. Both are highly processed seed oils that cause inflammation and are no longer part of my pantry. Mayonnaise can be tricky so the search for a "fool proof" method took some time. Inspired Taste does a great job of trouble shooting the method of making your own mayonnaise and offers lots of helpful tips. Below is their recipe. I did change the oil from grapeseed, safflower seed, and canola to avocado and light olive oil. Be sure to check out their site for more tips and recipes. 
 Fail-Proof Homemade Mayonnaise
​
https://www.inspiredtaste.net/25943/homemade-mayonnaise-recipe/
​

1 large egg at room temperature (or pasteurized egg)
1 tablespoon Dijon mustard
1 tablespoon red or white wine vinegar
1/4 teaspoon kosher salt, or more to taste
1 cup (240 ml) neutral flavored oil, avocado oil, light olive oil, ½ olive oil combined with another light oil
1 teaspoon fresh lemon juice, optional

 
1. Add egg to the bowl of a food processor (or immersion blender) and process for 20 seconds. Add the mustard, vinegar, and salt. Process for another 20 seconds.
 
2. Scrape the sides and bottom of the bowl, turn the food processor on then begin to slowly add the oil in tiny drops until about a quarter of the oil has been added (this is critical for proper emulsification).
 
3. When you notice that the mixture is beginning to thicken and emulsify, you can be a little less strict. With the processor on, continue to add it slowly, but increase to a very thin stream instead of drops of oil.
 
4. When all of the oil has been added, scrape the bottom and sides of the bowl and process for an extra 10 seconds. Taste mayonnaise for seasoning then add salt, lemon juice or extra vinegar to taste.
 
5. Note, if the mayo seems too thin, slowly stream in more oil with the processor running until thick.
 
ADAM AND JOANNE'S TIPS

  • Storing Homemade Mayonnaise: Store covered in the refrigerator up to a week.
  • Raw eggs: When choosing eggs for homemade mayonnaise, go for fresh, properly refrigerated, clean grade A or AA eggs with intact shells.
  • Olive oil: Olive oil can be a little overpowering so use one that’s light and fruity and consider only replacing half of the oil called for in the recipe with olive oil and use something more neutral for the rest.
0 Comments

Edible Flowers in Liz's Garden

7/13/2020

0 Comments


Perennials
Rose
Violets/Pansies
Chrysanthemums
Daylilies
Hibiscus

Annuals
Bachelor Buttons
Calendula
Geranium
Gladiolas
Impatiens
Marigold
Petunia
Tulip Petals
Sunflower
Tuberous Begonia
​Zinnia
 
Trees
Lilac
Apple Blossoms
Peach Blossoms
Pear Blossoms
Peony
Northern Red Bud
 
Herbs
Alliums
Basil
Bee Balm
Borage
Chamomile
Cilantro
Dill
Lavender
Anise Hyssop
Nasturtium
Rosemary
Sage
Sweet Woodruff
Picture
Picture
Picture
0 Comments

Plum and Cucumber Salad w/Rosewater Vinaigrette

7/13/2020

0 Comments

 
Serves 4
3 black plums, pitted and thinly sliced
Cucumber-about 2 cups thinly sliced (peeled or unpeeled)
¼ cup parsley, chopped
2 tablespoons chopped mint
2 tablespoons olive oil or avocado oil
1 tablespoon rice vinegar
2 teaspoons rosewater-to taste (1/4 tsp rose extract-adjust to taste)
¼ cup fresh rose petals for garnish
Kosher salt and pepper to taste
 

1. Combine the plums, cucumber, parsley, and mint, in a bowl. 
2. In a small jar combine the oil, vinegar, and rosewater and shake to combine.
3. Toss the salad with the vinaigrette. Season with salt and pepper to taste. Serve in bowls with the rose petals.
0 Comments
    Picture

    Picture
    Follow Liz on Instagram

    Picture
    photo credit-Judy Santos-jsantosphotography.com

    Recipe Categories

    All
    15 Minute Meals
    Air Fryer
    Appetizers/Hors D'oeurves
    Avocados
    Baking
    Beautifully Delicious
    Beef
    Bread
    Breakfast
    Chaffles
    Charcuterie
    Chicken
    Cocktails
    Cookies
    Cooking For 1 Or 2
    Cooking With Beer
    Cooking With Chocolate
    Cooking With Wine
    Cooking W/Spices
    Cook's Corner TV
    Cook The Book Cookbook Series
    Dairy
    Desserts
    Dressings
    Drinks
    Edible Flowers
    Edible Garden
    Edible Landscapes
    Eggs
    Entrees
    Facebook Live
    Fall Recipes
    Fats
    Food Film/TV
    Grain Bowls
    Herbs
    Hollis NH Recipes
    Instant Pot
    Intermittent Fasting
    Kitchen/Pantry
    Knife Class
    Lamb
    Lobster Tails & Cocktails
    Local Farms
    Lowcarb
    Low Carb Breakfast
    Mocktails
    Pantry
    Passionate Dishes For Your Valentine
    Pasta
    Pie Classes
    Pies Savory
    Pork
    Rubs
    Salads
    Sandwiches
    Sauces
    Seafood
    Seasoning Blends
    Seed Oils
    Sheet Pan Meals
    Side Dishes
    Smoothies
    Soups/Stews
    Starches/Pasta/Beans
    Stock
    Tapas
    Tarts Savory
    Thanksgiving
    Turkey
    Tuscan Recipes
    Vegetables
    Vegetarian
    Winter Pantry


    Liz's Cookbook

    Liz's Gardens

    Picture

    Liz's Kitchen

    Picture

    Archives

    November 2023
    September 2023
    August 2023
    May 2023
    April 2023
    March 2023
    February 2023
    January 2023
    December 2022
    November 2022
    October 2022
    September 2022
    August 2022
    July 2022
    June 2022
    May 2022
    April 2022
    March 2022
    February 2022
    January 2022
    December 2021
    November 2021
    October 2021
    September 2021
    August 2021
    July 2021
    June 2021
    May 2021
    April 2021
    March 2021
    February 2021
    January 2021
    December 2020
    November 2020
    October 2020
    September 2020
    August 2020
    July 2020
    June 2020
    May 2020
    April 2020
    March 2020
    February 2020
    January 2020
    November 2019
    October 2019
    September 2019
    May 2019
    October 2018
    March 2018
    November 2017
    October 2017
    September 2017
    August 2017
    June 2017
    May 2017
    February 2017
    June 2016
    February 2016
    December 2015
    November 2015
    October 2015
    August 2015
    July 2015
    June 2015
    May 2015
    April 2015

    RSS Feed

CONTACT US

Email

[email protected]

Telephone

Location

603-321-5011
Hollis, NH